Setting up your Time Off Balances
How to use this page:
This page is designed to help you work through your balance setup. Follow each step in the order it appears.
- Watch - Overview of the Balance Setup Process
- Create your list of absence reason codes
- Choose your Negative Balance settings
- Create your list of Employees and Identifiers
- Download your Balance Import File Template
- Watch - Understand the Balance Import File
- Set up your balance import file
- Send the import file to your implementation rep

2. Create a list of
Absence Reason Codes:
First, we need a list of absence reasons that you'll be assigning balances to for each employee.
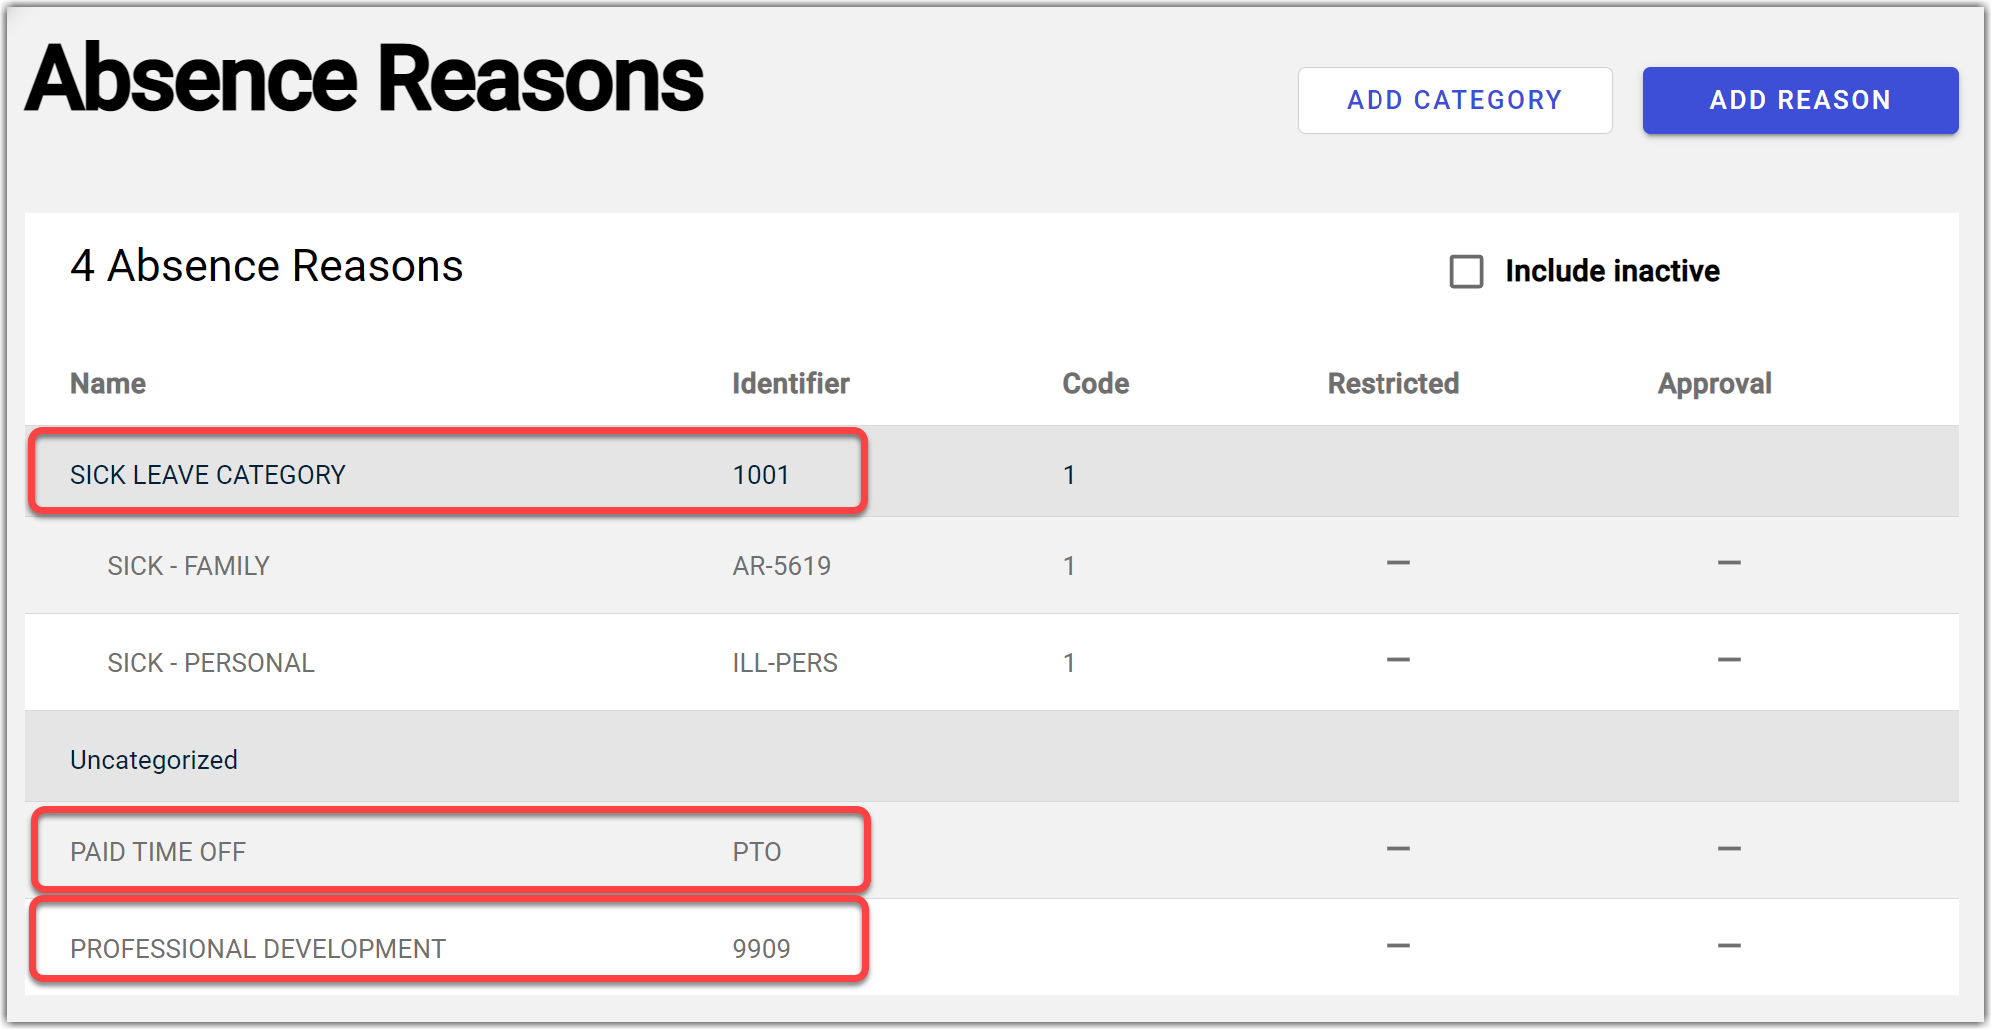
- Go to SETTINGS > ABSENCE REASONS
- Write down the exact Name and Identifier of each Absence Reason you want to assign balances for.
- If you use Absence Categories (aka "Buckets"), write down the exact Name and Identifier of your absence reason category as well.


Do I need to use Categories?
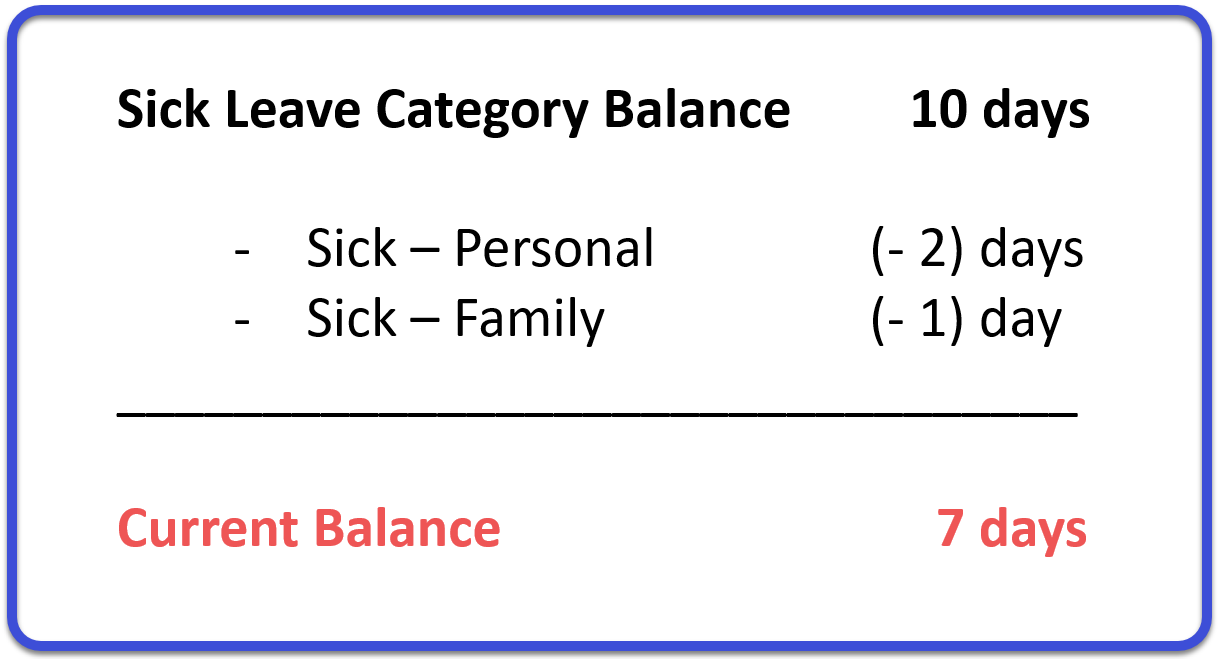
Categories, or Buckets, are ONLY needed when multiple reasons pull from the same balance. For example:
- A teacher gets 10 "Sick Leave Category" Days.
- The teacher takes two "Sick - Personal" days, and the "Sick Category" balance drops to 8.
- The teacher then takes a "Sick - Family" absence > the "Sick Category" balance drop to 7.
Do your balances work this way? If so, use Categories.

4. Create your list of Employees
Now we need a list of your employees and their Identifiers. These ID's will be used to assign balances to each employee in your Balance Import File. If you have a list of employee ID's from another system, excellent! Feel free to use that list. If not, use the directions below to get a list of employee ID's.
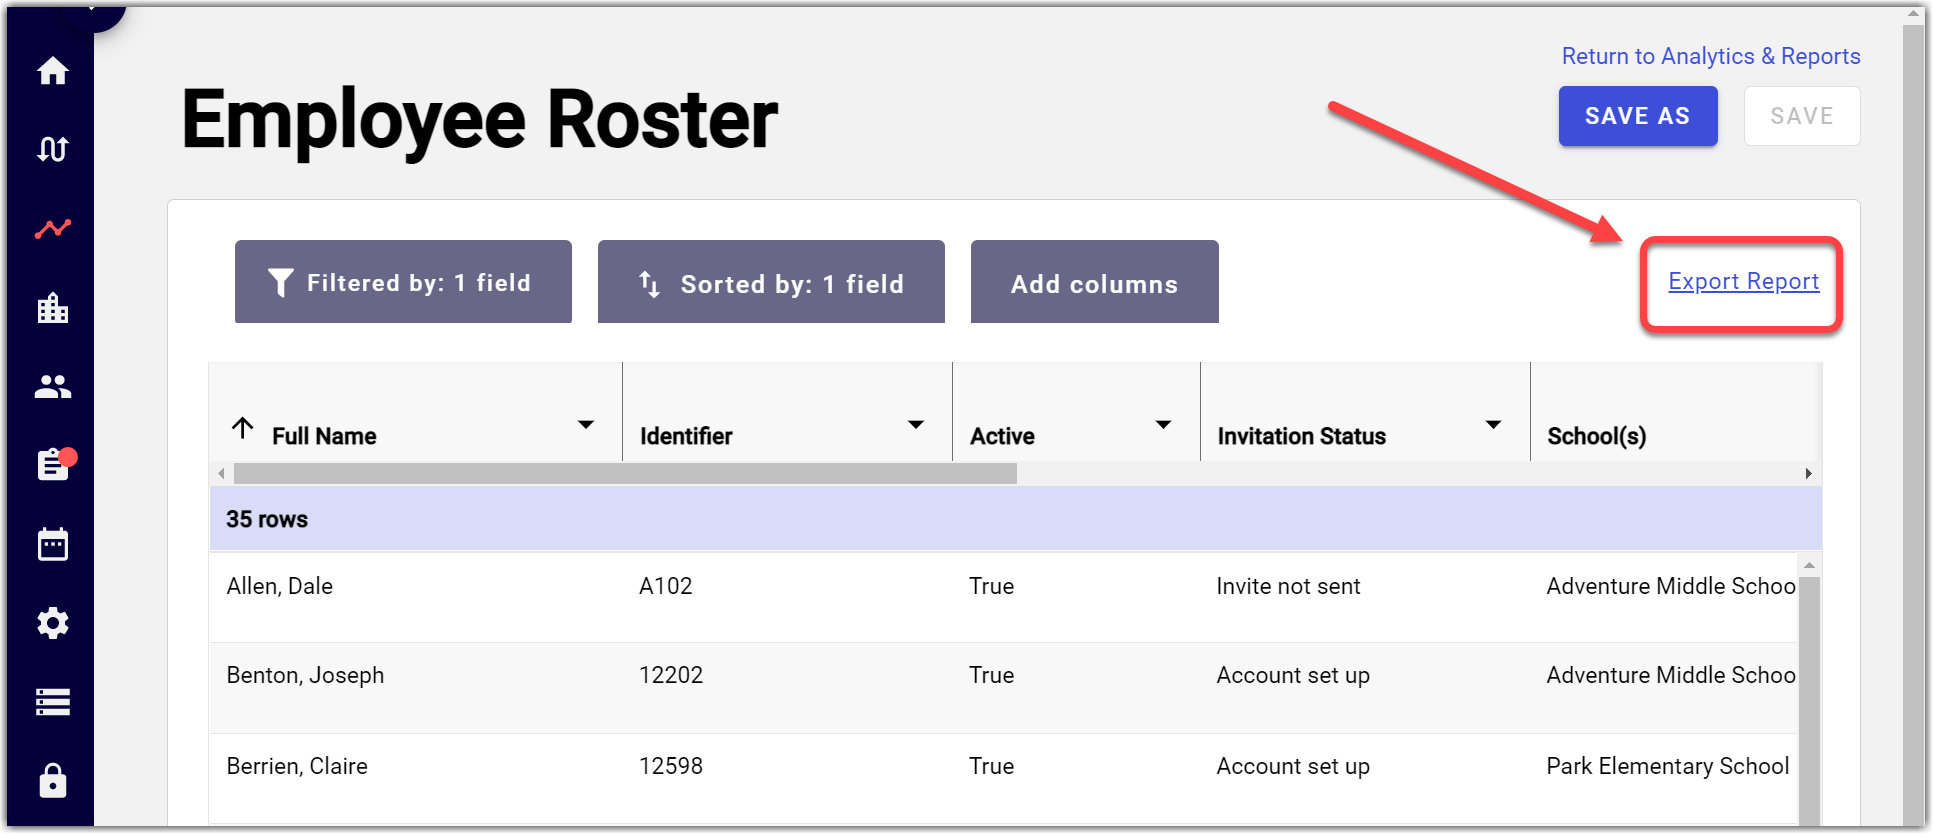
- Go to ANALYTICS & REPORTS, then click EMPLOYEE ROSTER
- Click EXPORT REPORT on the right.
- Open the file, and remove any employees from this list that will not receive any balances
- Delete all columns from the excel doc except the FULL NAME and the IDENTIFIER column. Save it to your computer.

7. Set up your Balance Import File
Now, use your list of employees, and Absence reasons to set up your Balance Import File. Here are some things to keep in mind:
-
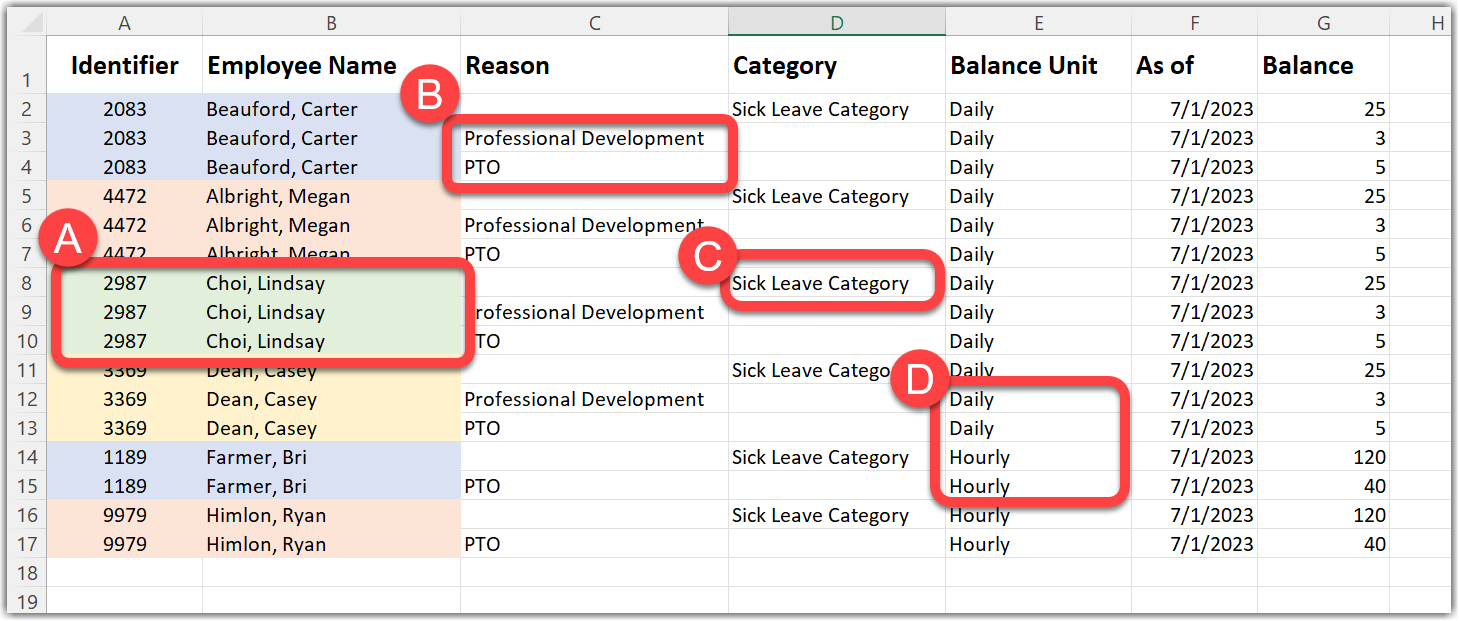
A: Sort your file by "Identifier" to group employees. If an employee gets three balances, then that employee needs three rows.
- B & C: Individual Absence Reasons go in the "Absence Reason ID" column, and Categories go in the "Absence Reason Category ID" column.
- D: Watch your Tracking Types. If an employee gets 40 hours, make sure you don't give them 40 days.
When you're finished, you should have something that looks like this:


